Mastering the Sleek Low Bun: A 5-Minute Tutorial for Polished, Frizz-Free Hair
In the realm of contemporary hairstyling, few aesthetics command as much respect and versatility as the sleek low bun. This hairstyle has transcended temporary trends to become a definitive hallmark of sophistication, professionalism, and effortless grace. Whether we are preparing for a high-stakes corporate presentation, a formal evening gala, or simply desire a curated look for daily activities, the sleek low bun offers a solution that is both practical and aesthetically superior. We recognize that achieving that coveted mirror-like shine and a frizz-free finish can often feel daunting, yet with the correct methodology and professional-grade products, this look can be mastered in a mere five minutes.
Our collective preference for the sleek low bun stems from its ability to accentuate facial features while providing a clean, structured silhouette. It is the ultimate "power hairstyle" that communicates discipline and attention to detail. In this comprehensive guide, we provide an exhaustive breakdown of the techniques required to eliminate flyaways, secure the hair with structural integrity, and maintain a polished appearance throughout the most demanding schedules. By focusing on the intersection of hair health and styling precision, we ensure that your transition to a sleek aesthetic does not compromise the vitality of your strands.
The Essential Toolkit for Professional Results
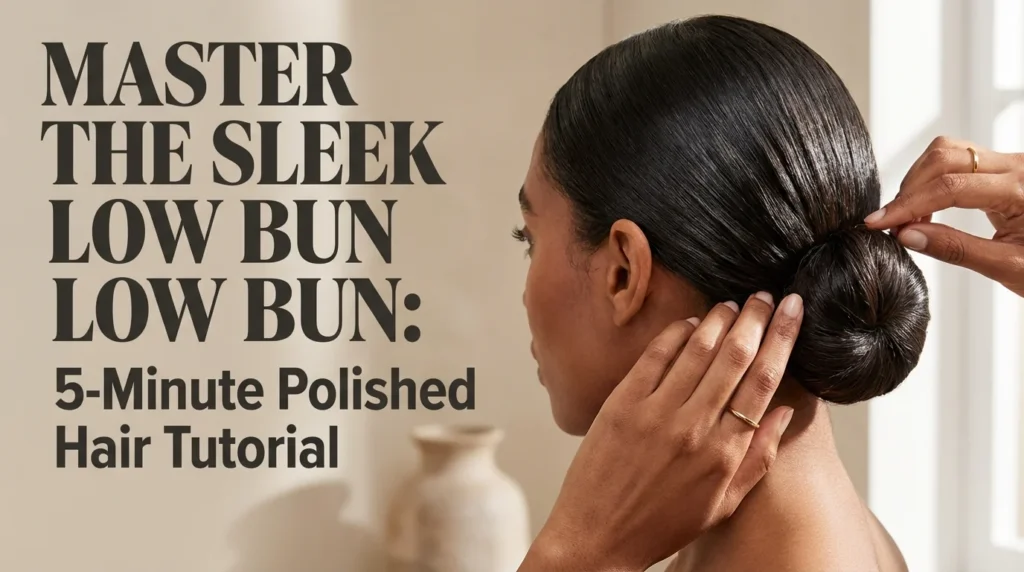
A professional woman wearing a sleek low bun in an office setting.
To achieve a result that rivals high-end salon styling, we must first curate a toolkit designed for precision and control. The foundation of a flawless low bun lies not just in the technique, but in the mechanical advantages provided by specific instruments. We highly recommend investing in a boar bristle brush. Unlike synthetic alternatives, natural boar bristles are adept at distributing the scalp's natural oils along the hair shaft, which naturally increases luminosity and flattens the cuticle for a smoother surface.
In addition to the brush, a fine-tooth tail comb is indispensable for creating a sharp, intentional part. Whether you opt for a classic middle part or a dramatic side part, the tail comb allows for the surgical precision required to ground the look in symmetry. For the actual securing of the hair, we suggest using non-snag elastics or hair bungees. These tools provide the necessary tension to hold the hair firmly in place without causing the breakage often associated with traditional rubber bands.
Finally, the chemical component of your toolkit is equally vital. A strong-hold, flexible hairspray ensures that the style remains static without appearing "crunchy" or unnatural. We also emphasize the use of a styling pomade or edge control wax to address the hairline and nape of the neck, where shorter "baby hairs" are most likely to disrupt the sleekness of the final form. A lightweight finishing oil or shine spray acts as the final touch, providing that high-gloss, editorial finish that defines the modern sleek aesthetic.
Pre-Styling Preparation: Establishing a Frizz-Free Foundation
A collection of high-end hair tools and products for creating a sleek bun.
The success of a sleek low bun is often determined before the first hairpin is even inserted. We believe that hair preparation is the most critical phase in preventing frizz and humidity-induced expansion. While this tutorial focuses on a five-minute execution, the state of the hair significantly impacts how easily the strands will conform to the scalp. Ideally, the hair should be clean but well-conditioned. If you are working with "second-day" hair, the natural oils can actually assist in the sleekness, but we must ensure the roots are not overly congested.
For those with naturally textured or curly hair, we recommend a preliminary blow-dry session using a concentrated nozzle and a round brush to encourage the cuticles to lie flat. Applying a heat protectant infused with anti-frizz properties is a non-negotiable step. This not only shields the hair from thermal damage but also creates a moisture barrier that prevents the style from reverting in humid conditions. If your hair is particularly prone to flyaways, applying a small amount of leave-in conditioner
or smoothing cream to damp hair will provide the weight necessary to keep the strands disciplined.
If time is of the essence and you are starting with dry hair, we suggest a light misting of water or a detangling spray to make the hair more pliable. We must avoid styling hair that is completely bone-dry and brittle, as this leads to "mechanical frizz"—the tiny breaks and static caused by brushing dry strands into a tight formation. By creating a damp, product-rich environment, we allow the hair to be molded into the desired shape with minimal resistance and maximum shine.
Step-by-Step Tutorial: Executing the 5-Minute Sleek Low Bun
Close-up of a professional boar bristle hairbrush.
Executing the perfect bun requires a blend of speed and deliberate movement. We have refined this process into a streamlined sequence that guarantees a professional finish every time.
Step 1: The Precision Part
Begin by using your tail comb to define your part. We find that a clean center part offers a modern, editorial vibe, while a deep side part provides a more classic, glamorous appeal. Ensure the part extends back to the crown of the head to maintain a balanced distribution of hair volume on either side.
Step 2: The Initial Smooth
Gather the hair at the nape of the neck. Using your boar bristle brush, start from the part and brush the hair downward and backward toward the base of the skull. It is essential to brush in layers; do not simply smooth the top surface. We recommend lifting the top sections and brushing the hair underneath to ensure there are no hidden bumps or tangles. Apply a small amount of styling gel or pomade to the roots during this process to facilitate the "slicked" effect.
Step 3: Securing the Ponytail
Once the hair is perfectly smooth against the scalp, secure it into a low ponytail at the very base of your hairline. Use a high-tension elastic to ensure the base is tight. A loose base is the primary cause of a sagging bun. After securing, we suggest taking your tail comb and gently smoothing over any remaining ridges, pushing them toward the elastic.
Step 4: Constructing the Bun
Twist the ponytail firmly from base to ends. As you twist, the hair will naturally want to coil around the base of the ponytail. Guide the hair into a circular shape, keeping it close to the head. For a "clean girl" aesthetic, tuck the ends of the hair under the coil and secure them with u-shaped hairpins or bobby pins. For a more modern "spiky" look, you can leave the ends out slightly and use a flat iron to make them pin-straight.
Step 5: Final Polish and Set
Once the bun is pinned securely, assess the hairline. Use an old toothbrush or a small detailing brush dipped in edge control to lay down any baby hairs along the forehead and temples. This adds an extra layer of refinement. Finish with a generous misting of firm-hold hairspray and a final spray of gloss enhancer.
Advanced Techniques for All-Day Structural Integrity
Close-up of hair oil application for a smooth hair base.
A common frustration we observe is the "dropping" of the bun after several hours of wear. To prevent this, we must employ advanced pinning techniques. Rather than simply sliding a bobby pin into the hair, we recommend the "hook and flip" method. Insert the pin into the outer edge of the bun, catch a small amount of the scalp hair, and then flip the pin inward toward the center of the bun. This creates an anchor effect that prevents the weight of the hair from pulling the style downward.
Furthermore, we suggest using criss-crossed bobby pins for maximum security. When two pins overlap in an "X" shape, they lock onto each other, creating a mechanical bond that is far stronger than a single pin. For those with exceptionally thick or long hair, utilizing hair screws (spin pins) can be a revolutionary change. These spiral-shaped tools do the work of twenty bobby pins, keeping the bun centered and tight against the nape throughout the entire day.
We also advocate for the use of a hair net for occasions that require absolute perfection, such as dance performances or weddings. A fine, invisible hair net that matches your hair color can be wrapped around the bun once it is formed to catch any stray layers that might escape. This is a secret of professional stylists to maintain a flawless surface under harsh lighting or during vigorous movement.
Troubleshooting Common Styling Challenges
Blow drying hair with a concentrator nozzle to remove frizz.
Even with a detailed tutorial, certain hair types present unique challenges. One frequent issue we encounter is the "nape sag," where the hair at the bottom of the head becomes loose and creates a pouch-like effect. To solve this, we suggest tilting your head back slightly while securing the ponytail. When you return your head to a neutral position, the hair at the nape will be taut and smooth.
Another common obstacle is the appearance of stubborn flyaways that refuse to be tamed by hairspray alone. In these instances, we recommend the "hairspray-and-brush" technique. Spray a layer of high-hold spray onto the hair, and then immediately—while it is still wet—smooth it down with the side of your hairspray can or a cold flat iron. The pressure and the setting power of the spray work together to "laminate" the hair to the head.
For those with fine hair who struggle with the bun looking too small or "thin," we recommend the use of a hair donut or padding. However, to keep it looking modern and sleek, ensure the padding is small and entirely covered by your natural hair. Alternatively, gently backcombing the ponytail before twisting it can add the necessary internal volume to create a more substantial, sophisticated bun silhouette.
Versatility: Adapting the Sleek Low Bun for Every Occasion
A step-by-step visual guide for creating a sleek low bun.
While the core technique remains consistent, the sleek low bun is incredibly adaptable. We can modify the "vibe" of the hairstyle through subtle changes in parting and accessories. A sharp middle part paired with bold, chunky gold jewelry creates a high-fashion, editorial aesthetic that is currently trending in the "clean girl" movement. This version is perfect for day-to-night transitions, providing a look that is as suitable for a coffee meeting as it is for a dinner date.
For more formal environments, a deep side part adds a touch of Hollywood glamour. This variation often works best when the bun is shifted slightly off-center to balance the weight of the part. We also encourage the use of minimalist accessories. A single, architectural hair clip placed just above the bun or a thin silk ribbon tied around the base can elevate the hairstyle from a standard "updo" to a curated fashion statement.
Furthermore, the sleek low bun serves as an excellent foundation for braided variations. By braiding the ponytail before coiling it, you introduce a complex texture that catches the light differently while maintaining the polished perimeter of the style. This "braided sleek bun" is particularly effective for outdoor events where wind might otherwise disrupt a traditional twist.
Maintaining Hair Health While Styling
Using a tail comb to create a precision center part.
We must address the importance of hair integrity when frequently wearing sleek, tight styles. The tension required for a sleek low bun can, if not managed correctly, lead to traction alopecia or breakage along the hairline. We advise against wearing this style every single day. Rotating your hairstyle allows the hair follicles to recover from the directional tension.
When you do opt for a sleek look, ensure you are using silk or satin scrunchies whenever possible, or elastics that are specifically marketed as "damage-free." When removing the style at the end of the day, we recommend applying a small amount of oil or conditioner to the elastic before cutting or sliding it out to prevent snagging.
Finally, a weekly deep conditioning treatment is essential to replenish the moisture that styling products may strip away. A healthy, hydrated hair shaft is naturally smoother and more resilient, making the process of achieving a frizz-free sleek bun significantly easier over time. By balancing high-end styling with rigorous hair care, we ensure that your hair remains as beautiful when it is down as it is when it is expertly coiffed.
The sleek low bun is more than just a convenience; it is a powerful tool in our personal branding arsenal. It provides a polished, professional, and timeless appearance that works across all hair types and lengths. By mastering the 5-minute technique—focusing on the right tools, meticulous preparation, and strategic pinning—we can all achieve a salon-quality finish that radiates confidence and elegance.