What to Do Before and After a Manicure to Keep Nails Looking Neat Longer
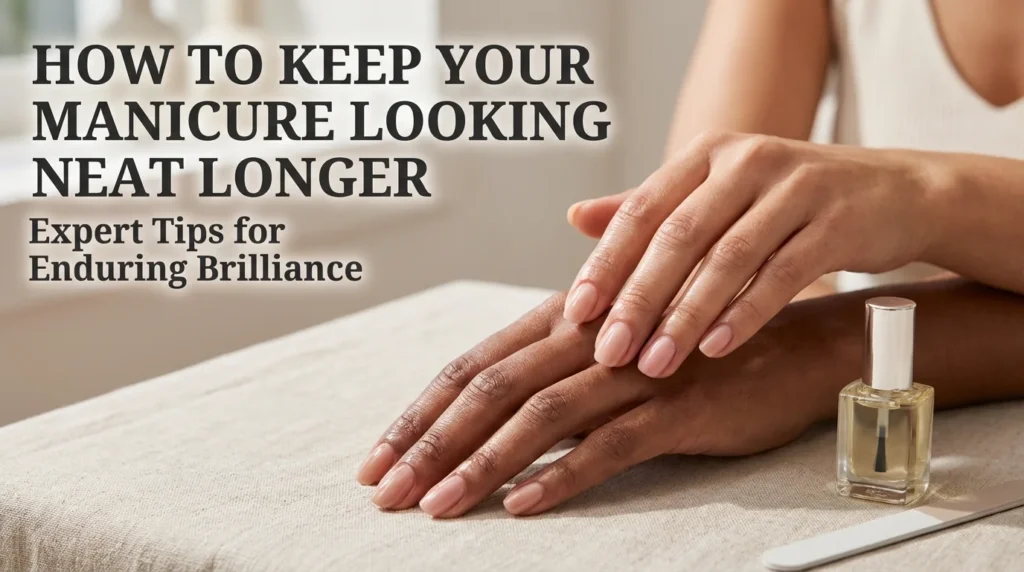
The pursuit of a flawless manicure is a ritual of self-care that many of us prioritize to maintain a polished and professional appearance. However, the frustration of a chip, peel, or loss of shine only days after an appointment is a common grievance. We understand that a manicure is an investment of both time and resources, and extending the life of that investment requires a strategic approach that begins long before you sit in the technician's chair and continues well after you leave the salon.
To achieve enduring brilliance and maintain the structural integrity of your nails, one must look beyond the application of color. The longevity of a manicure is rooted in the health of the natural nail plate, the precision of the preparation, and the diligence of the aftercare routine. In this comprehensive guide, we will explore the essential protocols that ensure your nails remain immaculate for as long as possible. By following these expert-backed strategies, we can transform a standard service into a long-lasting aesthetic statement.
The Foundation: Essential Pre-Manicure Preparation
Applying cuticle oil to natural nails before a manicure.
Before we even consider the shade of polish, we must focus on the biological canvas. The condition of your natural nails significantly dictates how well the polish or gel will adhere. We recommend beginning your preparation at least 48 hours before your scheduled appointment. The primary goal during this phase is hydration. Dry, brittle nails are prone to micro-fractures, which cause the polish to lift. By consistently applying a nutrient-rich cuticle oil and a high-quality hand cream, we ensure the nail plate is flexible rather than fragile.
Another critical step in the preparation process is the avoidance of prolonged water exposure. While it may seem counterintuitive, the nail plate is highly porous and can absorb water, causing it to expand. When the nail later dries and contracts, it can cause the overlying polish to crack or lose its bond. We advise wearing protective gloves during household chores involving water and avoiding long hot baths or swimming sessions immediately preceding your appointment. This ensures the nail is in its most stable, contracted state when the service begins.
Furthermore, we must address the removal of any existing product. If you are wearing gel or acrylics, we strongly discourage any "picking" or "peeling," which strips away the top layers of the keratin. This damage creates an uneven surface that is difficult for new products to grip. Instead, ensure that old polish is removed gently using a non-acetone remover, or leave the professional removal to your technician. Starting with a smooth, undamaged surface is the first rule of manicure longevity.
Strategic Habits During the Manicure Appointment
Comparison of water-exposed nails versus protected nails for manicure preparation.
While much of the technical work is performed by the professional, our awareness of the process is vital. We should always opt for a "dry manicure" when possible. Traditional soaking can cause the nail to swell, leading to the aforementioned contraction issues once the polish is applied. A dry manicure, utilizing electric files or manual tools to gently push back the cuticles and clear the nail plate, provides a more stable foundation for long-wear formulas.
We must also ensure that the nail plate is thoroughly dehydrated and cleansed of oils before the base coat is applied. Any residual oils from lotions or natural sebum will act as a barrier, preventing the polish from "locking" onto the nail. We recommend observing that the technician uses a lint-free wipe with a professional dehydrator or high-percentage isopropyl alcohol. This step is non-negotiable for achieving a high-tenacity bond
.
The application technique itself is the third pillar of during-service care. We advocate for the application of thin, even layers rather than thick coats. Thick polish takes longer to cure and is more susceptible to "bubbling" or denting. Additionally, the technician should always "cap the free edge"—the process of running the brush along the very tip of the nail. This seals the polish around the edge, providing a buffer against the daily friction that typically leads to tip-wear and chipping.
The Critical First 24 Hours: Post-Service Protocol
Professional nail technician performing a manicure with precision tools.
The first 24 hours after a manicure are the most precarious. Even if the polish feels dry to the touch, or the gel has been "cured" under a UV/LED lamp, the chemical bonds are often still stabilizing. During this window, we must be exceptionally vigilant about temperature fluctuations. Excessive heat—such as that from a sauna, a hot shower, or even a blow dryer—can cause the polish to soften or the bond to weaken, leading to premature lifting.
We also advise against any activity that puts mechanical stress on the nails. This is not the time for heavy lifting, typing with the tips of the nails, or opening soda cans. The nails should be treated as "jewels, not tools." Any slight bend in the natural nail during the first day can cause microscopic separations between the nail and the polish. By allowing the product to fully settle and harden without interference, we set the stage for weeks of wear.
Furthermore, we should continue to avoid excessive moisture. While it is necessary to wash our hands, we recommend using cool or lukewarm water and patting the hands dry immediately. Do not submerge your hands in water for extended periods. This initial period of "curing" or "hardening" is when the top coat achieves its maximum durability. Protecting it now prevents the dullness and micro-scratches that often plague a manicure in its second week.
Daily Maintenance: Sustaining the Gloss and Integrity
Macro shot of a nail brush capping the free edge of a fingernail.
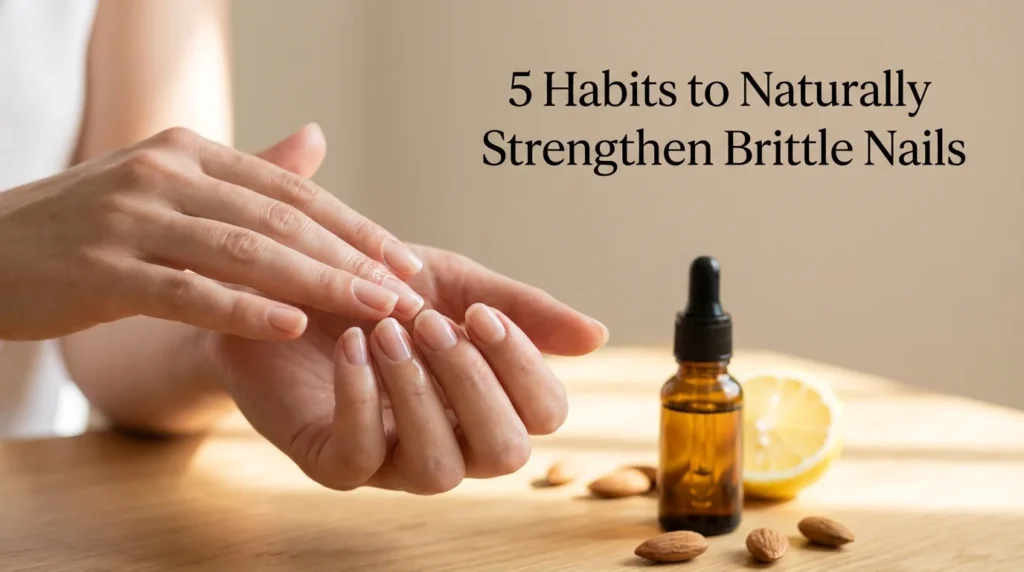
Once the initial 24-hour period has passed, our focus shifts to preventative maintenance. The most significant enemy of a long-lasting manicure is brittleness. As the days pass, the natural oils in our skin and nails are depleted by hand washing and environmental factors. We must replenish this moisture daily. We recommend applying jojoba-based cuticle oil at least twice a day. Jojoba oil has a molecular structure small enough to penetrate the nail polish and the nail plate, keeping the entire structure flexible.
In addition to hydration, we must consider the top coat's resilience. For traditional polish manicures, applying a fresh layer of a high-quality, fast-drying top coat every two to three days can work wonders. This "refresher" layer fills in tiny scratches and adds a new shield of UV protection and shine. It essentially acts as a sacrificial layer, taking the brunt of daily wear so that the color underneath remains untouched.
We also suggest a "check-up" of the nail edges. If we notice a very slight roughness at the tip, we can use a fine-grit crystal nail file to very gently smooth the edge. This prevents a minor snag from turning into a full-blown chip. However, this must be done with extreme care to avoid breaking the "seal" at the tip. By being proactive rather than reactive, we maintain that just-stepped-out-of-the-salon aesthetic.
Protecting Your Investment: Lifestyle Adjustments
Freshly manicured hand avoiding heat and moisture.
To keep nails looking neat longer, we must evaluate our daily interactions with the world. Chemicals are one of the fastest ways to ruin a manicure. Household cleaning agents, detergents, and even certain skincare products (like those containing AHAs or high concentrations of alcohol) can dissolve the finish of your polish or cause gel to lift. We must make it a non-negotiable habit to wear rubber gloves whenever we are cleaning or handling chemicals.
Furthermore, we must be mindful of how we use our hands. We often use our nails for tasks they weren't designed for, such as scraping off labels, picking at objects, or typing aggressively. These actions put repetitive pressure on the free edge of the nail. We should train ourselves to use the pads of our fingers or appropriate tools for these tasks. This simple shift in behavior can easily double the lifespan of a manicure.
Another overlooked factor is sun exposure. Just as UV rays damage our skin, they can also cause nail polish to yellow or become brittle. If we spend a significant amount of time outdoors, we should look for top coats that contain UV inhibitors. This is especially important for lighter shades and French manicures, where discoloration is more evident. By treating our nails with the same level of care as our facial skin, we ensure their vibrancy and strength.
The Role of Internal Health in Manicure Longevity
Person typing on a laptop using finger pads to protect their manicure.
We cannot ignore the fact that the strongest manicures sit upon the strongest nails. The structural integrity of the nail is largely determined by our internal health. A diet rich in biotin, zinc, and protein provides the building blocks for healthy keratin production. We should ensure we are consuming adequate amounts of leafy greens, eggs, nuts, and fish to support nail growth from the matrix.
Hydration is equally important from the inside out. When the body is dehydrated, it prioritizes vital organs, often leaving the hair and nails dry and brittle. By drinking sufficient water throughout the day, we maintain the inter-cellular moisture levels of the nail bed, which prevents the nail from becoming a "flaking" surface that polish cannot adhere to.
If we struggle with naturally weak nails, we might consider a consultation regarding collagen or biotin supplements. However, consistency is key. It takes several months for a new nail to grow from the base to the tip, so the benefits of nutritional changes will manifest in the long-term durability of our future manicures. A healthy foundation is the ultimate secret to a manicure that refuses to quit.
Troubleshooting: How to Handle Minor Imperfections
Daily nail maintenance using hand cream and cuticle oil.
Even with the best care, accidents happen. The way we respond to a minor chip or lifting can determine whether the entire manicure is lost. If a small chip occurs in traditional polish, we can "feather" the edges of the chip with a tiny amount of nail polish remover on a detail brush, then fill in the gap with the original color. Once dry, a fresh top coat will blend the repair seamlessly.
For lifting in gel manicures, we must resist the urge to pull the lifted section. This can tear the natural nail layers. Instead, if we cannot get to a salon immediately, we can use a tiny amount of professional nail glue to temporarily seal the edge, or carefully clip the lifted portion with sterilized nippers to prevent it from snagging further.
Finally, if the shine begins to fade due to contact with lotions or sunscreens, a quick wipe with a lint-free pad and alcohol can often restore the luster. This removes the film of product buildup that dulls the finish. By having a small "emergency kit" of a file, top coat, and oil, we can manage these minor issues and keep our nails looking impeccably neat until our next professional visit.
In conclusion, the longevity of a manicure is not a matter of luck; it is a result of meticulous preparation, professional technique, and disciplined aftercare. By valuing the health of our natural nails and protecting them from environmental stressors, we can enjoy the confidence that comes with a perfectly maintained set of nails. We invite you to integrate these practices into your beauty routine and witness the transformation in your manicure’s durability and grace.